d. Run nextflow container
In this section, you will run a basic pipeline for quantification of genomic features from short read data implemented with Nextflow. Nextflow enables scalable and reproducible scientific workflows using software containers.
1. Create a new container image with nextflow
Let’s begning by creating a new version of the container image.
Change the Dockerfile with the nextflow container
cd $CONTAINER_WORKDIR
cat > Dockerfile << EOF
FROM nextflow/rnaseq-nf

ENV DEBIAN_FRONTEND=noninteractive
RUN apt-get --allow-releaseinfo-change update && apt-get update -y && apt-get install -y git python3-pip curl jq

RUN curl -s https://get.nextflow.io | bash \
 && mv nextflow /usr/local/bin/

RUN pip3 install --upgrade awscli
RUN chmod 755 /usr/local/bin/nextflow
EOF
Remove container cached layer
docker system prune -a -f
Build the new container image
docker build -t ${CONTAINER_REPOSITORY_URI}:v2 -t ${CONTAINER_REPOSITORY_URI}:latest .
You have built your container image successfully, you will push the v2 local container image to the container repository you created earlier.
docker push ${CONTAINER_REPOSITORY_URI}:v2
docker push ${CONTAINER_REPOSITORY_URI}:latest
2. Download the genomics workflow
cd /shared
git clone https://github.com/seqeralabs/nextflow-tutorial.git
cd nextflow-tutorial
3. Run the Genomics Pipeline
A container contains the applications, libraries and system packages that you installed during the container image creation.
At runtime, the container only its content and does not have access to files and directories outside.
They can be made available inside the running container by binding the external directory to a directory inside the container.
In the case of running Nextflow for this lab, the /shared/nextflow-tutorial directory contains the workflow description in scripts7.nf that will be executed by Nextflow.
One the job will complete, results will be stored in the --outdir=/mnt of the container that is the /shared/nextflow-tutorial directory of the cluster where the results will be stored.
Let’s create a slurm batch script with the following command:
cat > nextflow_sub.sh << EOF
#!/bin/bash

#SBATCH --job-name=nextflow
#SBATCH --partition=queue1
#SBATCH --output=%x_%j.out
#SBATCH --error=%x_%j.err
#SBATCH --ntasks=1

srun singularity run --bind /shared/nextflow-tutorial:/mnt docker://`echo ${CONTAINER_REPOSITORY_URI}`:v2 nextflow run /mnt/script7.nf --reads '/mnt/data/ggal/*_{1,2}.fq' --outdir=/mnt
EOF
Submit the job to Slurm to run on 1 c5.xlarge instance the nextflow genomics pipeline composed of 4 steps with the following command:
sbatch nextflow_sub.sh
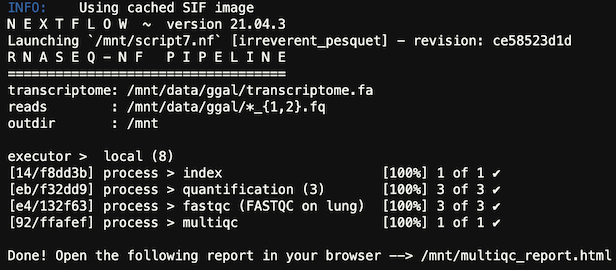
The output of the job will be in the nextflow_[SLURM_JOB_ID].out file and similar to this:
There was a previous error with this tutorial that had the wrong github url
https://github.com/aws-samples/aws-hpc-tutorials/blob/isc22/static/scripts/post-install/container-install.sh
This was resolved in #260.
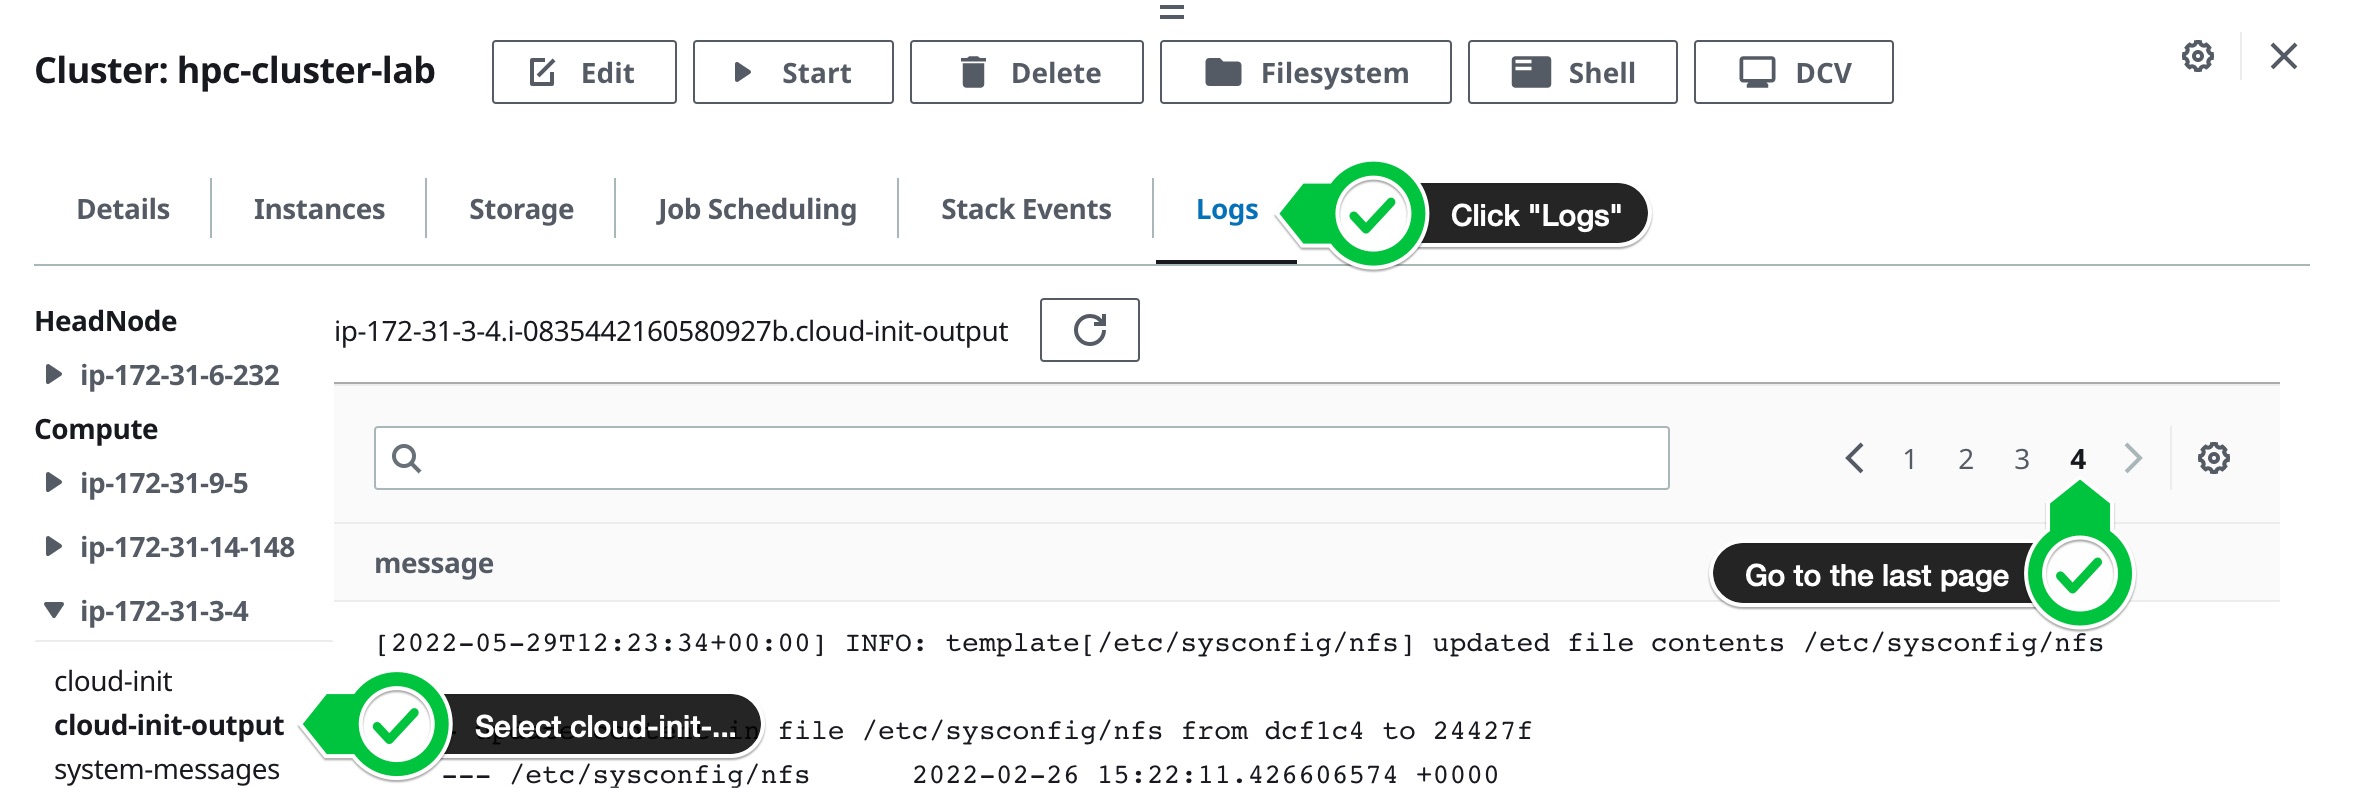
If you hit this error you can debug it by looking at the Logs tab and looking at the cloud-init-output log of one of the compute nodes like so:
 To resolve this, update the cluster to use the url
 https://raw.githubusercontent.com/aws-samples/aws-hpc-tutorials/isc22/static/scripts/post-install/container-install.sh
You have now run a basic genomics pipeline and you won’t need the cluster in the next labs. The next section will go over how to delete your HPC Cluster.