d. Set up a Job Definition
In this step, you set up a template used for your jobs, known as a job definition. A job definition is not required, but a good practice to use so that you can version how your jobs are launched. For more information about job definitions, see Job Definitions.
Run the following commands on your Cloud9 terminal
- Copy the Cloudformation template which will be used to create the AWS Batch Job Definition.
aws s3 cp s3://isc22-hpc-labs/isc22-nextflow-batch-jd.template.yaml .
- Set the following environment variables to be passed as parameters to the Cloudformation stack.
- ImageId - The name of the Amazon ECR container repository where the Docker image is stored. You will run the image that you built in Lab III.
- ECSRoleArn - The name of the ECS task execution role created in Section b. of this Lab.
- BucketNameResults - The name of the Amazon S3 bucket created in Section a. of this Lab to store the results of the Nextflow pipeline run.
- NFJobQueue - The name of the AWS Batch job-queue to execute the downstream Nextflow jobs.
REPOSITORY_NAME=isc22-container
ImageId=`aws ecr describe-repositories --repository-names ${REPOSITORY_NAME} --output text --query 'repositories[0].[repositoryUri]' --region $AWS_REGION`
echo "export ImageId=${ImageId}"

ECSRoleName=ecsTaskExecutionRole
ECSRoleArn=`aws iam get-role --role-name ${ECSRoleName} --query 'Role.[Arn]' --output text`
echo "export ECSRoleArn=${ECSRoleArn}"

NFJobQueue=nextflow-jq
echo "export NFJobQueue=${NFJobQueue}"

source s3_vars
BucketNameResults=${BUCKET_NAME_RESULTS}
echo "export BucketNameResults=${BucketNameResults}"
- Deploy the Cloudformation template to create the Batch Job definition.
aws cloudformation deploy --stack-name nextflow-batch-jd --template-file isc22-nextflow-batch-jd.template.yaml --capabilities CAPABILITY_IAM --region ${AWS_REGION} --parameter-overrides NFJobQueue=${NFJobQueue} BucketNameResults=${BucketNameResults} ImageId=${ImageId} ECSRoleArn=${ECSRoleArn}
- It will take a few mins for the stack to be created. Once complete you will see a message as below:
Waiting for changeset to be created..
Waiting for stack create/update to complete
Successfully created/updated stack - nextflow-batch-jd
-
Verify that the Batch resources are created successfully. In the AWS Management Console, in the search bar, search for and choose Batch
-
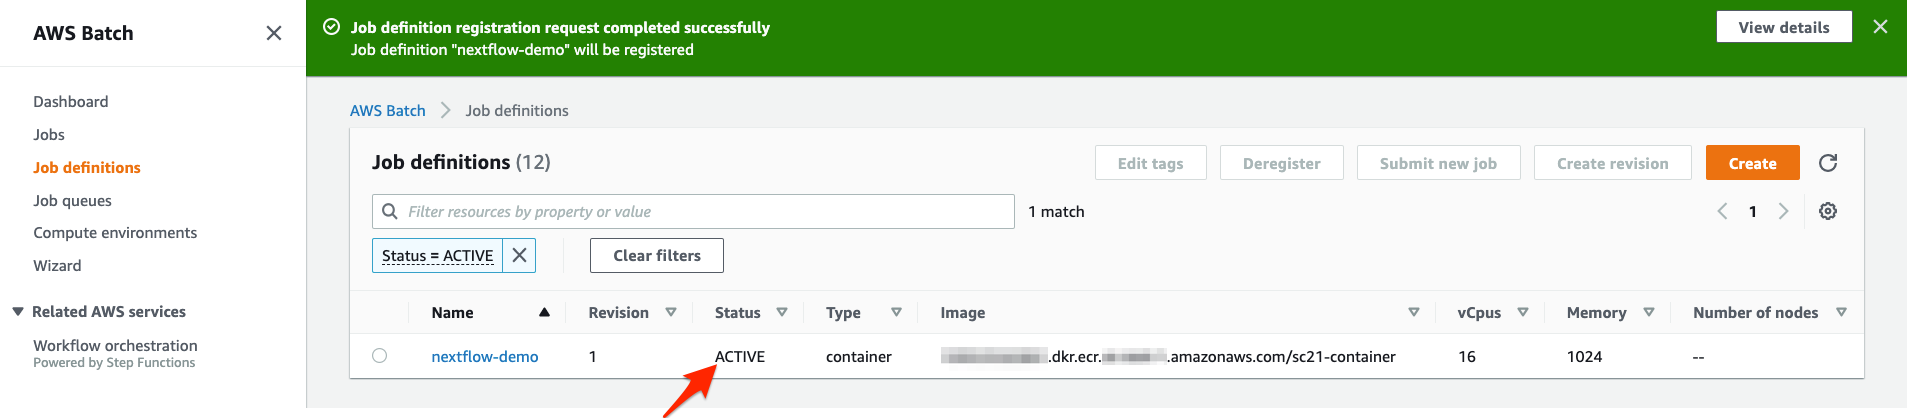
In the left pane, choose Job definitions and confirm that a Job Definition nextflow-demo is created. Make sure Status is ACTIVE.
At this point, you have completed creating the Batch environment. Next, take a closer look at compute environment, job queue, and job definition you created.
Highly recommended to examine the contents of the downloaded Cloudformation template (isc22-nextflow-batch-ce-jq.template.yaml) to understand the usage of infrastructure as code to create the Batch resources in this section.