c. Setup project in CodeBuild
In this section, you will create and setup a build project in AWS CodeBuild.
AWS CodeBuild is a fully managed continuous integration service that compiles source code, runs tests, and produces software packages that are ready to deploy.
With CodeBuild, you don’t need to provision, manage, and scale your own build servers
-
In the AWS Management Console search bar, type and select CodeBuild. Double check that you are using CodeBuild in the same AWS Region that you have used in the previous steps.
-
Click on Create build project.
-
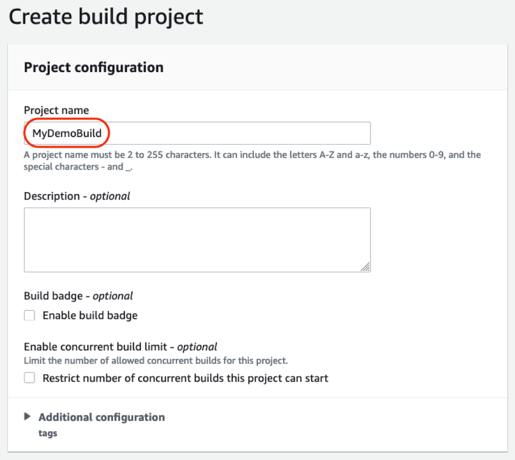
In the Project configuration section, enter MyDemoBuild as the Project name and leave the rest as defaults in this section.
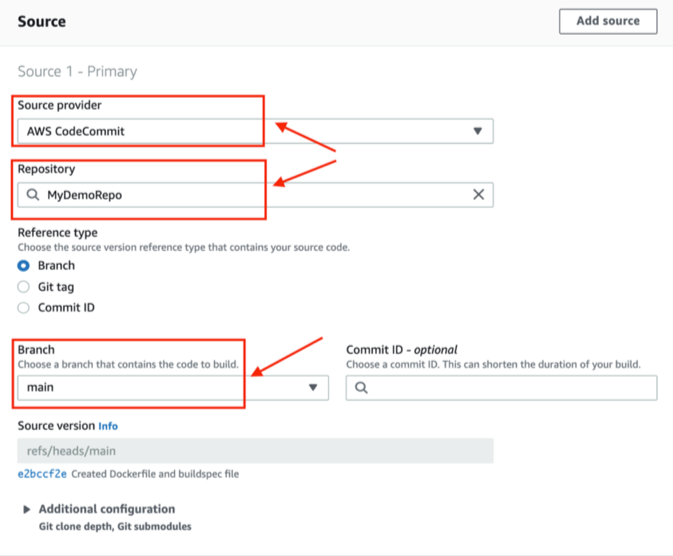
- In the Source section, select AWS CodeCommit from the dropdown as the Source provider. In the Repository, enter the name of the codecommit repository MyDemoRepo created earlier. For the Branch select the main branch (which contains the code, in this case the Docker container to build)
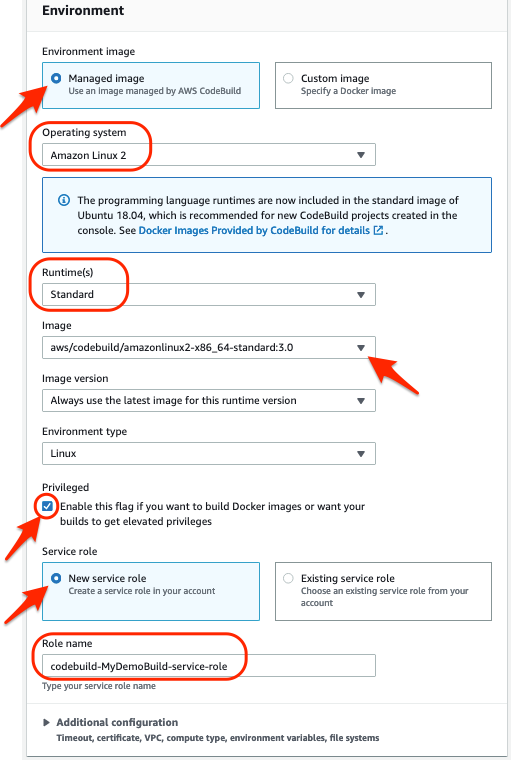
- In the Environment section, select the settings as shown below
- Make sure to enable the Privileged flag required to build the Docker images
- Select the New service role and let the project create a new service role required for CodeBuild
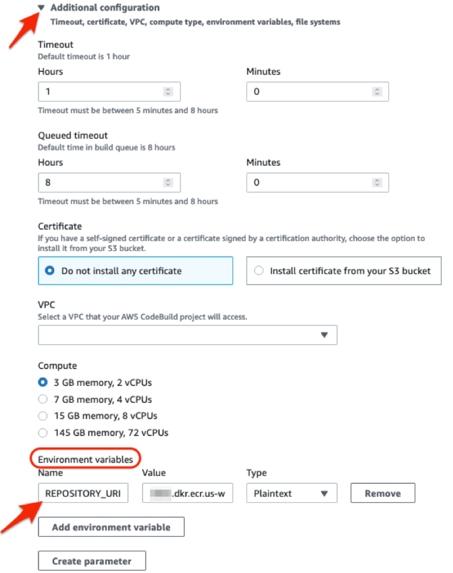
- Expand the Additional configuration section and, in the Environment section, keep all settings as default except the following:
- Under the Environment variables, in the Name field enter the Name as REPOSITORY_URI
- In the Value field provide the Amazon ECR repository URI created in the Lab 2 (see below). Keep the Type as default Plaintext
- You can obtain the Amazon ECR repository URI by running the below CLI command on Cloud9, this repo comes from Lab 2.
- The output should look as "<account-id>.dkr.ecr.<region>.amazonaws.com/isc22-container". Copy without the quotes and paste in the Value field.
REPO_NAME=isc22-container
aws ecr describe-repositories --query repositories[].[repositoryName,repositoryUri] --region $AWS_REGION | grep "/${REPO_NAME}"
-
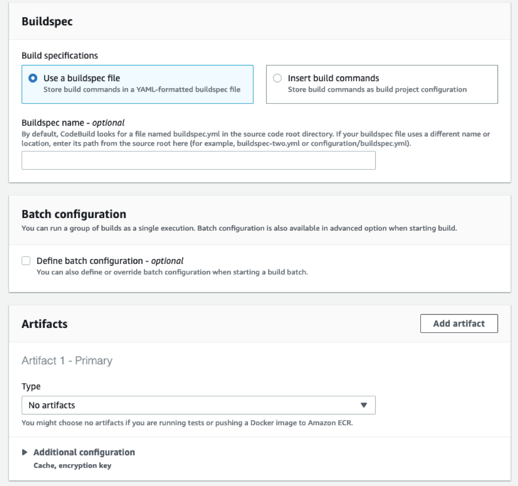
In the Buildspec section, select Use a buildspec file option. By default CodeBuild looks for a file named buildspec.yml in the source code root directory. Since we named our buildspec file as buildspec.yml and put it in the root directory of the CodeCommit repo, you can skip providing a name or absolute path
-
Keep the defaults in Batch configuration and Artifacts section.
-
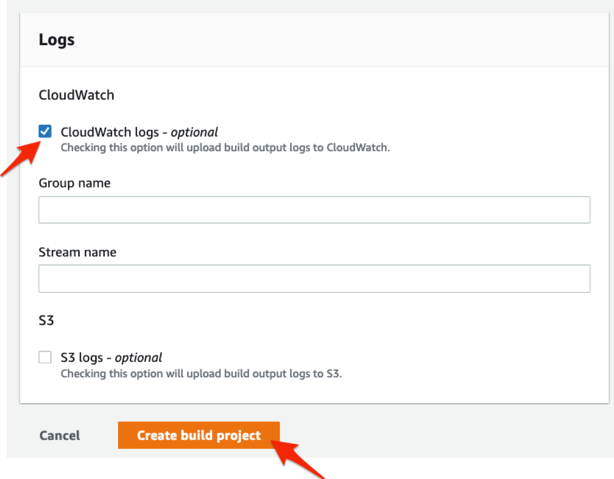
In the Logs section enable the CloudWatch logs. This option will upload the build output logs to CloudWatch
-
Click on Create build project
- Since the CodeBuild is going to interact with Amazon ECR, the CodeBuild service role created requires additional permissions. In the Cloud9 terminal, execute the following
aws iam attach-role-policy --policy-arn arn:aws:iam::aws:policy/AmazonEC2ContainerRegistryFullAccess --role-name codebuild-MyDemoBuild-service-role
When executing the above if you run into an error as shown below, it means you have not disabled AWS managed temporary credentials in Cloud9 as covered in the Preparation section of the Lab.
Kindly fix that and re-do the above step.

In the next section, you will build a CodePipeline which you will use to automate your container build process